

How To Delete "My Templates" On Internet
Whether you're starting from a built-in template or updating one of your own, Word's congenital-in tools assist y'all update templates to suit your needs. To update your template, open the file, brand the changes you want, and and then save the template.
-
Click File > Open.
-
Double-click This PC. (In Word 2013, double-click Computer).
-
Scan to the Custom Office Templates folder that'southward under My Documents.
-
Click your template, and click Open.
-
Make the changes yous want, then save and shut the template.
Building templates
-
Add building blocks to a template
-
Add together content controls to a template
-
Add content controls
-
Insert a text command where users can enter text
-
Insert a picture control
-
Insert a combo box or a drop-downwardly list
-
Insert a date picker
-
Insert a check box
-
Insert a building block gallery control
-
-
Gear up or change the properties for content controls
-
-
Add instructional text to a template
-
Add protection to a template
-
Add protection to parts of a template
-
Assign a password to a template
-
Add building blocks to a template
Edifice blocks are reusable pieces of content or other certificate parts that are stored in galleries to be accessed and reused at any time. Yous can also salve edifice blocks and distribute them with templates.
For example, you lot may create a report template that provides your template users with ii cover letter types to choose from when they create their own study based on your template.
Add content controls to a template
Make your templates flexible by calculation and configuring content controls, such as rich text controls, pictures, drib-down lists, or date pickers.
For case, you might create a template that includes a drib-down list. If you allow editing to the drop-downward listing, other people can modify the list options to run into their needs.
Note: If content controls are not bachelor, you may accept opened a document or a template that was created in an earlier version of Word. To utilize content controls, you must catechumen the document to the Word 2013 file format by clicking File > Info > Convert, and then clicking OK. After you convert the document or template, salve it.
Before you can add content controls, you lot need to show the Programmer tab.
-
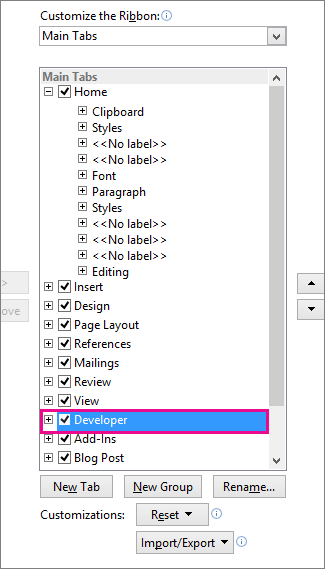
Click File > Options > Customize Ribbon.
-
Under Customize the Ribbon, select Principal Tabs.
-
In the list, select the Developer check box, and then click OK.
Add content controls
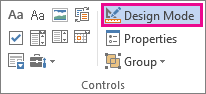
On the Programmer tab, in the Controls grouping, click Design Mode, then insert the controls that you desire.
Insert a text command where users can enter text
In a rich text content control, users tin can format text as bold or italic, and they can type multiple paragraphs. If yous desire to limit what users add, insert the plain text content control.
-
In the document, click where y'all want to insert the command.
-
On the Programmer tab, in the Controls group, click Rich Text Content Control
 or the Manifestly Text Content Command
  .
.
Insert a moving-picture show control
-
Click where yous want to insert the control.
-
On the Developer tab, in the Controls group, click Picture Control
 .
.
Insert a combo box or a drop-downwards list
In a combo box, users can select from a listing of choices that you provide or they can type in their own information. In a drop-down list, users can only select from the list of choices.
-
On the Developer tab, in the Controls group, click the Philharmonic Box Content Control
 or Drop-Downwards List Content Command
  .
. -
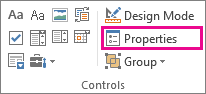
Select the content control, and and then on the Developer tab, in the Controls grouping, click Properties.
-
To create a listing of choices, click Add under Combo Box Backdrop or Drop-Downwardly List Properties.
-
Type a pick in the Display Proper noun box, such as Yes, No, or Peradventure. Repeat this stride until all of the choices are in the drop-down list.
-
Fill in any other properties that you want.
Note: If you select the Contents cannot be edited bank check box, users won't be able to click a selection..
Insert a date picker
-
Click where you want to insert the engagement picker control.
-
On the Developer tab, in the Controls grouping, click the Appointment Picker Content Control
 .
.
Insert a cheque box
-
Click where y'all want to insert the bank check box control.
-
On the Developer tab, in the Controls group, click the Bank check Box Content Command
 .
.
Insert a building block gallery control
You can apply building block controls when y'all want people to cull a specific block of text.
For example, building block controls are helpful if you're setting up a contract template, and you need to add different boilerplate text depending on the contract's specific requirements. You can create rich text content controls for each version of the average text, and then you tin can use a building block gallery control every bit the container for the rich text content controls.
Yous can also use a building block command in a form.
-
Click where y'all want to insert the control.
-
On the Developer tab, in the Controls grouping, click Building Block Gallery Content Control
 .
. -
Click the content control to select it.
-
On the Developer tab, in the Controls grouping, click Properties.
-
Click the Gallery and the Category for the building blocks that y'all want to make available in the building cake control.
Set or change the properties for content controls
-
Select the content control, and click Backdrop in the Controls group.
-
In the Content Control Properties dialog box, cull whether the content control can be deleted or edited when someone uses your template.
-
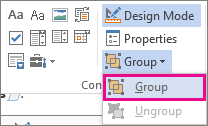
To continue several content controls or fifty-fifty a few paragraphs of text together, select the controls or the text, and then click Group in the Controls group.
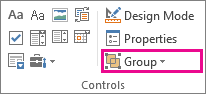
For example, maybe you have a three-paragraph disclaimer. If you utilise the Group command to group the three paragraphs, the three-paragraph disclaimer cannot be edited and can be deleted only every bit a grouping.
Add instructional text to a template
Instructional text can heighten the usability of the template that yous create. You can change the default instructional text in content controls.
To customize the default instructional text for your template users, practise the following:
-
On the Developer tab, in the Controls group, click Design Mode.
-
Click the content command where you want to revise the placeholder instructional text.
-
Edit the placeholder text and format it whatever way yous want.
-
On the Developer tab, in the Controls group, click Design Manner to turn off the design feature and save the instructional text.
Add protection to a template
You can add together protection to individual content controls in a template to aid prevent someone from deleting or editing a particular content control or group of controls, or yous tin aid protect all of the template content with a password.
Add protection to parts of a template
-
Open the template that you lot want to add protection to.
-
Select the content controls to which you desire to restrict changes.
Tip: Select multiple controls past holding down the CTRL primal while you click the controls.
-
On the Developer tab, in the Controls group, click Group, and so click Grouping once more.
-
On the Developer tab, in the Controls group, click Properties.
-
In the Content Control Backdrop dialog box, under Locking, do whatever of the following:
-
Select the Content command cannot exist deleted check box, which allows the content of the control to be edited only the command itself cannot be deleted from the template or a document that is based on the template.
-
Select the Contents cannot be edited check box, which allows you to delete the control but does not allow you to edit the content in the control.
-
Use this setting when y'all desire to protect text if it is included. For case, if y'all often include a disclaimer, you can aid ensure that the text stays the aforementioned, and you tin can delete the disclaimer for documents that don't crave it.
Assign a password to a template
To assign a password to the document so that only reviewers who know the password tin can remove the protection, exercise the following:
-
Open the template that yous want to assign a password to.
-
On the Review tab, in the Protect group, click Restrict Editing.
-
Under Starting time enforcement, click Aye, Start Enforcing Protection.
-
Blazon a password in the Enter new countersign (optional) box, and and then confirm the password.
Of import: If you lot choose not to use a password, anyone tin change your editing restrictions.
Use strong passwords that combine capital and lowercase letters, numbers, and symbols. Weak passwords don't mix these elements. Strong countersign: Y6dh!et5. Weak password: House27. Passwords should exist at to the lowest degree eight characters long. In general, longer a countersign is, the more secure information technology is.
It is critical that yous remember your password. If you forget your password, Microsoft cannot retrieve it. Shop the passwords that y'all write down in a secure place away from the information that they aid protect.

How To Delete "My Templates" On Internet,
Source: https://support.microsoft.com/en-us/office/edit-templates-b2cb7adb-aec2-429f-81fd-3d5bd33cf264
Posted by: dillplarecturs.blogspot.com
0 Response to "How To Delete "My Templates" On Internet"
Post a Comment